Tile Installation Doesn't Have to Be a Mystery
Whether you're upgrading your kitchen backsplash, replacing worn-out bathroom floor tiles, or adding a sleek new shower surround, tile installation is one of the most impactful improvements you can make to your home. But if you've never been through the process before, it's natural to have questions. How long does it take? What happens to my old flooring? Will there be a mess?
For homeowners in Hialeah, where humidity and moisture are constant factors, professional tile installation isn't just about aesthetics — it's about protecting your home for the long haul. Here's a detailed look at what the process involves so you can feel confident and prepared before, during, and after your project.
Step 1: The Initial Consultation and Planning
Every quality tile installation starts with a conversation. A reputable contractor will visit your home to assess the space, take measurements, and discuss your goals. This is the time to talk about:
- The type of tile you want (ceramic, porcelain, natural stone, etc.)
- The layout and pattern you prefer
- Your budget and timeline expectations
- Any existing issues like water damage, uneven subfloors, or outdated underlayment
This planning phase is crucial. Skipping it — or rushing through it — is one of the most common reasons tile projects go sideways. A good contractor will give you an honest assessment of what's needed and a clear estimate before any work begins.
Step 2: Preparing the Surface
This is the step most homeowners don't think about, but it's arguably the most important one. Tile can only perform as well as the surface beneath it. Before a single tile is laid, the existing flooring or wall covering usually needs to be removed, and the substrate must be inspected and prepped.
What Surface Preparation Involves
- Removing old tile, vinyl, or other materials: This can be noisy and dusty, but it's essential for a clean foundation.
- Leveling the subfloor: Uneven surfaces lead to cracked tiles and failed grout lines down the road. Self-leveling compound or cement board may be needed.
- Moisture barriers: In Hialeah's humid climate, waterproofing membranes are especially important in bathrooms and any area exposed to moisture.
- Cleaning and priming: The surface must be free of dust, debris, and residue for proper adhesion.
This phase can take a full day or more depending on the condition of your existing surfaces. It's not glamorous work, but it's what separates a tile job that lasts decades from one that starts cracking within a year.
Step 3: Layout and Dry Fitting
Before any adhesive is applied, experienced installers will do a dry layout. This means placing tiles on the surface without mortar to plan the pattern, check alignment, and determine where cuts will fall. The goal is to avoid awkward thin slivers of tile along walls or around fixtures.
This step also gives you a chance to see the layout in person and request adjustments. It's much easier to shift a pattern now than after tiles are set in thinset.
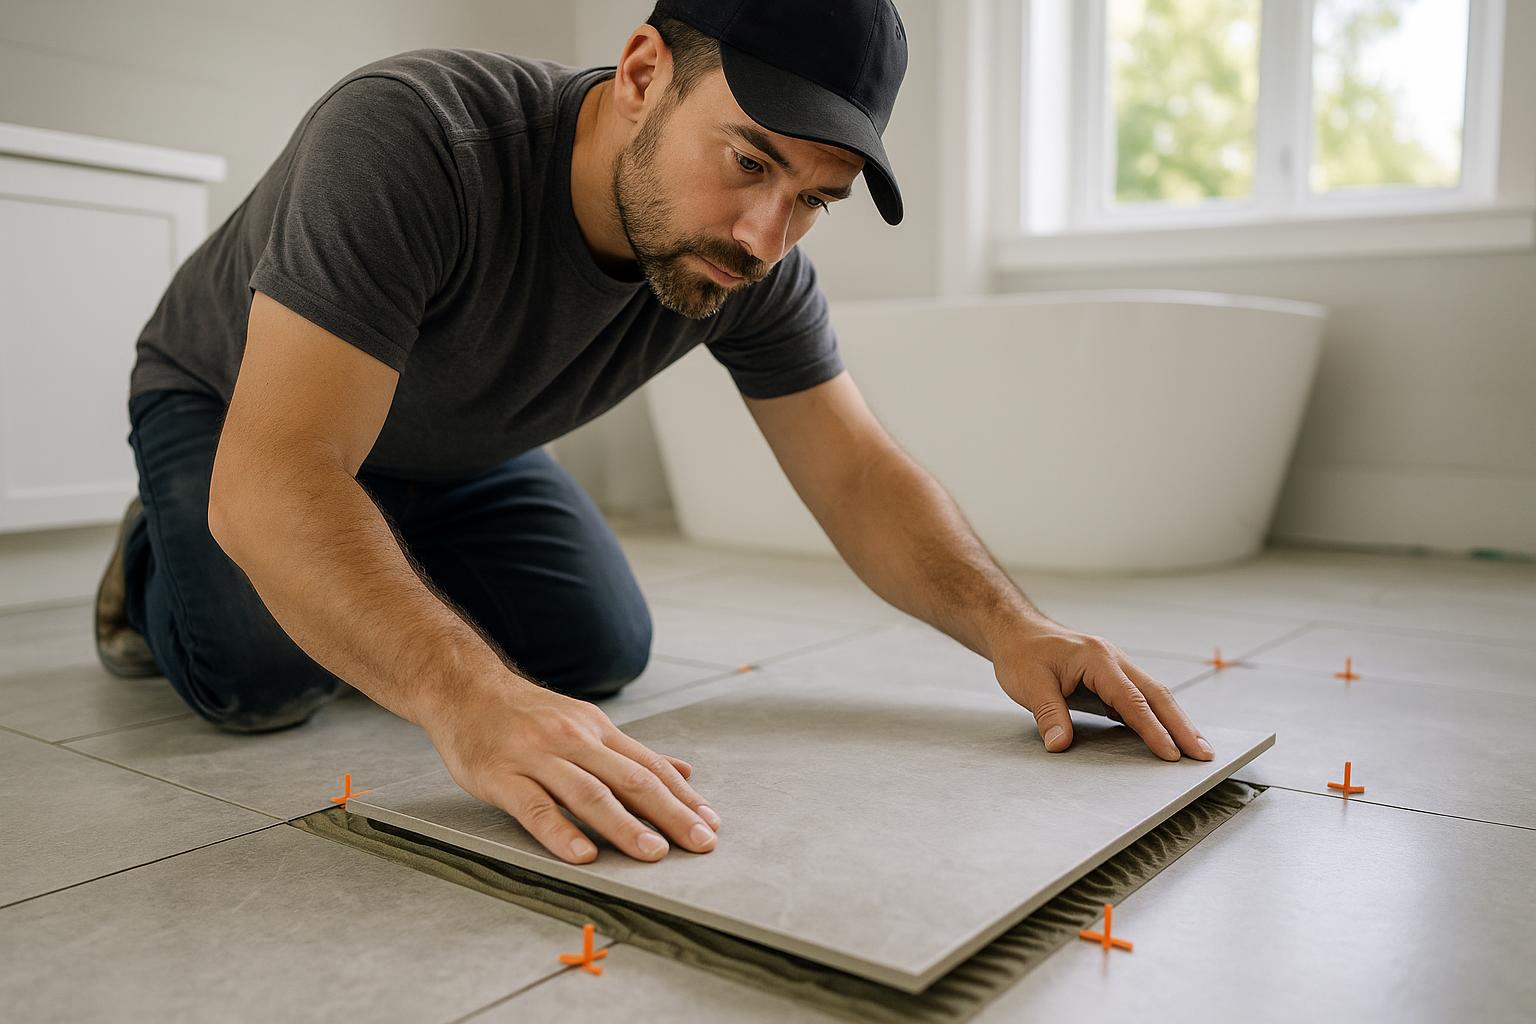
Step 4: Setting the Tile
Now comes the part you've been waiting for. The installer spreads thinset mortar in sections and carefully places each tile, using spacers to maintain consistent grout lines. Depending on the tile size, material, and pattern complexity, this process can move quickly or require meticulous attention to detail.
A few things to keep in mind during this phase:
- Large-format tiles (12x24 or bigger) require special techniques and often back-buttering to ensure full adhesive coverage.
- Natural stone tiles may vary in thickness and color, requiring extra care during placement.
- Patterned layouts like herringbone or diagonal designs take more time and generate more cuts, which can affect the timeline.
The area will be off-limits while the thinset cures, typically for 24 hours. Plan accordingly, especially if the work is happening in your only bathroom.
Step 5: Grouting
Once the thinset has fully cured, the spacers are removed and grout is applied. Grout fills the joints between tiles, creating a finished look and adding structural integrity. Your installer will spread the grout across the surface, pressing it into the joints, then wipe away the excess with a damp sponge.
Grout color matters more than most people realize. A contrasting grout can make your tile pattern pop, while a matching grout creates a seamless, uniform appearance. Discuss options with your contractor beforehand.
A Note on Grout Sealing
In South Florida's humid environment, sealing your grout is highly recommended — especially in bathrooms and kitchens. Sealed grout resists moisture, staining, and mildew, which means less maintenance for you over time. Ask your installer about sealing as part of the project.
Step 6: Finishing Touches and Cleanup
After the grout has cured, usually another 24 to 72 hours, the installer will complete the finishing details. This includes:
- Installing trim pieces, edge profiles, or transition strips
- Applying caulk along corners, edges, and where tile meets fixtures
- Cleaning the tile surface to remove any grout haze
- Doing a final walkthrough with you to check for any issues
A thorough cleanup should be part of any professional installation. You shouldn't be left scrubbing grout residue off your new tile.
How Long Does the Whole Process Take?
Timelines vary depending on the scope of the project, but here are some general estimates for Hialeah-area homes:
- Small bathroom floor (around 40-60 sq ft): 2-3 days
- Kitchen backsplash: 1-2 days
- Full shower surround: 3-5 days
- Large kitchen or living area floor: 4-7 days
These estimates include surface preparation, setting, grouting, and curing time. Complex patterns, custom cuts around obstacles, or unexpected subfloor repairs can extend the timeline.
Choosing the Right Tile for Hialeah Homes
Living in South Florida means dealing with heat, humidity, and the occasional tropical storm. When selecting tile, consider these practical factors:
- Porcelain tile is highly durable and water-resistant, making it ideal for bathrooms and entryways.
- Ceramic tile works well for walls and lower-traffic areas at a more affordable price point.
- Slip-resistant finishes are a smart choice for bathroom floors and outdoor-adjacent spaces.
- Lighter colors can help keep rooms feeling cool and open, which is a plus in warmer climates.
The Bottom Line
Tile installation is one of the best investments you can make in your home's durability, appearance, and value. But the quality of the result depends entirely on the quality of the process. From proper surface preparation to precise grouting, every step matters.
If you're a homeowner in Hialeah, Hialeah Gardens, Miami Lakes, or the surrounding areas and you're considering a tile project, White Oak Construction Hialeah is here to walk you through every step. We believe in honest craftsmanship and clear communication — no surprises, no shortcuts, just lasting results you can see and feel every day.